DIY MIDI Controller for Ableton with Arduino
Key Takeaways
Introduction
As music production becomes increasingly software-based, the desire for tactile, physical control remains strong among producers and musicians. There's something satisfying about turning a real knob or pressing a physical button rather than clicking with a mouse.
Commercial MIDI controllers can be expensive, and they often come with features you don't need or lack the specific controls you want. What if you could build your own custom MIDI controller tailored to your exact workflow?
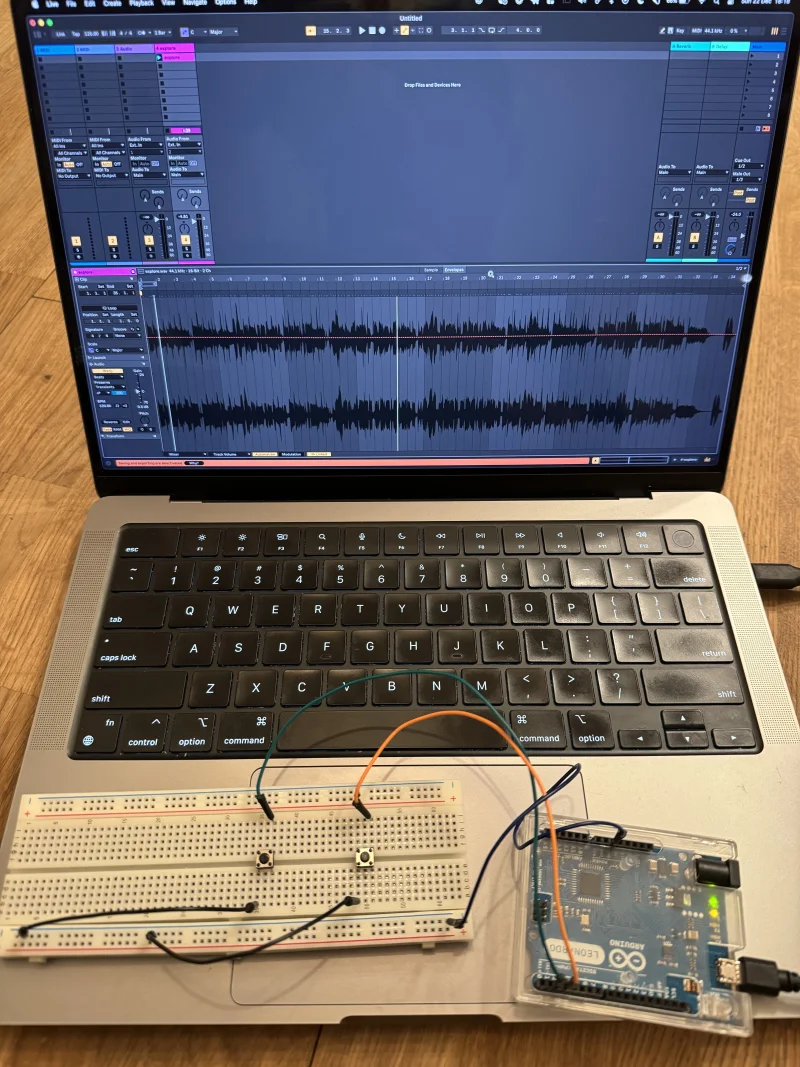
In this article, we'll walk through building a DIY MIDI Volume Controller for Ableton Live using an Arduino Leonardo. This proof-of-concept demonstrates the fundamentals of hardware-to-DAW communication and serves as a foundation for more complex custom controllers.
What We're Building
Our PoC is a simple but functional physical volume controller with two buttons:
- Volume Up - Increases the track volume
- Volume Down - Decreases the track volume
But we're not just building a basic button controller. We've implemented dynamic acceleration - the longer you hold a button, the faster the volume changes. This creates a natural, intuitive control feel that mirrors how you'd expect a physical device to behave.
Video Demonstration
See the controller in action:
Why Arduino Leonardo?
Not all Arduino boards are created equal when it comes to MIDI. The key requirement is native USB support.
| Board | Native USB | MIDI Support |
|---|---|---|
| Arduino Leonardo | Yes | Direct USB-MIDI |
| Arduino Micro | Yes | Direct USB-MIDI |
| Arduino Uno | No | Requires serial-to-MIDI bridge |
| Arduino Mega | No | Requires serial-to-MIDI bridge |
The Arduino Leonardo (and Micro) use the ATmega32U4 chip, which has built-in USB communication. This allows the board to appear as a native USB-MIDI device to your computer - no additional software or drivers needed.
When you plug in your Leonardo, your computer sees it as a MIDI device, just like any commercial controller.
Components You'll Need
| Component | Purpose |
|---|---|
| Arduino Leonardo | Microcontroller with native USB-MIDI |
| 2x Push Buttons | Volume up/down controls |
| USB Cable | Power and data connection |
| Breadboard (optional) | For prototyping |
| Jumper Wires | Connections |
Total cost: approximately $20-30 depending on where you source components.
Understanding MIDI Control Change Messages
Before diving into the code, let's understand how MIDI volume control works.
MIDI uses Control Change (CC) messages to transmit parameter changes. The format is:
[Status Byte] [Controller Number] [Value]
    0xBn           0-127          0-127
Where:
- Status Byte:
0xB0to0xBF(Control Change on channels 1-16) - Controller Number: Identifies which parameter (7 = Volume)
- Value: The parameter value (0-127)
Standard MIDI CC Numbers
| CC Number | Parameter |
|---|---|
| 1 | Modulation Wheel |
| 7 | Volume |
| 10 | Pan |
| 11 | Expression |
| 64 | Sustain Pedal |
For our volume controller, we'll send CC #7 messages.
The Code
Here's the complete Arduino sketch:
#include "MIDIUSB.h"

// Define button pins
const int VOL_UP_PIN = 2;
const int VOL_DOWN_PIN = 3;

// Volume state
int volumeLevel = 64; // Start at mid-level (0-127)

// Variables for dynamic delay
unsigned long pressStartTime = 0;
unsigned long currentDelay = 100;

void setup() {
  pinMode(VOL_UP_PIN, INPUT_PULLUP);
  pinMode(VOL_DOWN_PIN, INPUT_PULLUP);
}

void loop() {
  // Volume Up Button Logic
  if (digitalRead(VOL_UP_PIN) == LOW) {
    handleButtonPress(5);
  } else if (digitalRead(VOL_UP_PIN) == HIGH) {
    resetDelay();
  }

  // Volume Down Button Logic
  if (digitalRead(VOL_DOWN_PIN) == LOW) {
    handleButtonPress(-5);
  } else if (digitalRead(VOL_DOWN_PIN) == HIGH) {
    resetDelay();
  }
}

void handleButtonPress(int direction) {
  unsigned long currentTime = millis();

  // Speed up if button is held longer
  if (pressStartTime == 0) {
    pressStartTime = currentTime;
  } else if (currentTime - pressStartTime > 500) {
    currentDelay = max(20, currentDelay - 20);
  }

  volumeLevel = constrain(volumeLevel + direction, 0, 127);
  sendVolumeChange(volumeLevel);
  delay(currentDelay);
}

void resetDelay() {
  pressStartTime = 0;
  currentDelay = 200;
}

void sendVolumeChange(int volume) {
  midiEventPacket_t volumeChange;

  volumeChange.header = 0x0B;    // Control Change
  volumeChange.byte1 = 0xB0;     // Channel 1
  volumeChange.byte2 = 7;        // Volume CC
  volumeChange.byte3 = volume;   // Value

  MidiUSB.sendMIDI(volumeChange);
  MidiUSB.flush();
}
Code Breakdown
1. Pin Configuration
pinMode(VOL_UP_PIN, INPUT_PULLUP);
pinMode(VOL_DOWN_PIN, INPUT_PULLUP);
We use the Arduino's internal pull-up resistors. This means:
- Button not pressed =
HIGH - Button pressed =
LOW
This simplifies wiring - we only need to connect buttons between the pin and ground.
2. Dynamic Speed Control
The acceleration logic is the most interesting part:
if (pressStartTime == 0) {
  pressStartTime = currentTime;
} else if (currentTime - pressStartTime > 500) {
  currentDelay = max(20, currentDelay - 20);
}
- First 500ms: Volume changes at a steady pace (200ms delay)
- After 500ms: Delay decreases by 20ms each iteration
- Minimum delay: 20ms (maximum speed)
This creates a natural "ramp-up" feel - tap for fine adjustments, hold for quick sweeps.
3. MIDI Message Construction
midiEventPacket_t volumeChange;
volumeChange.header = 0x0B;    // USB-MIDI event type
volumeChange.byte1 = 0xB0;     // MIDI status: CC on channel 1
volumeChange.byte2 = 7;        // Controller number: Volume
volumeChange.byte3 = volume;   // Value: 0-127
The MIDIUSB library handles the USB protocol; we just need to format our MIDI message correctly.
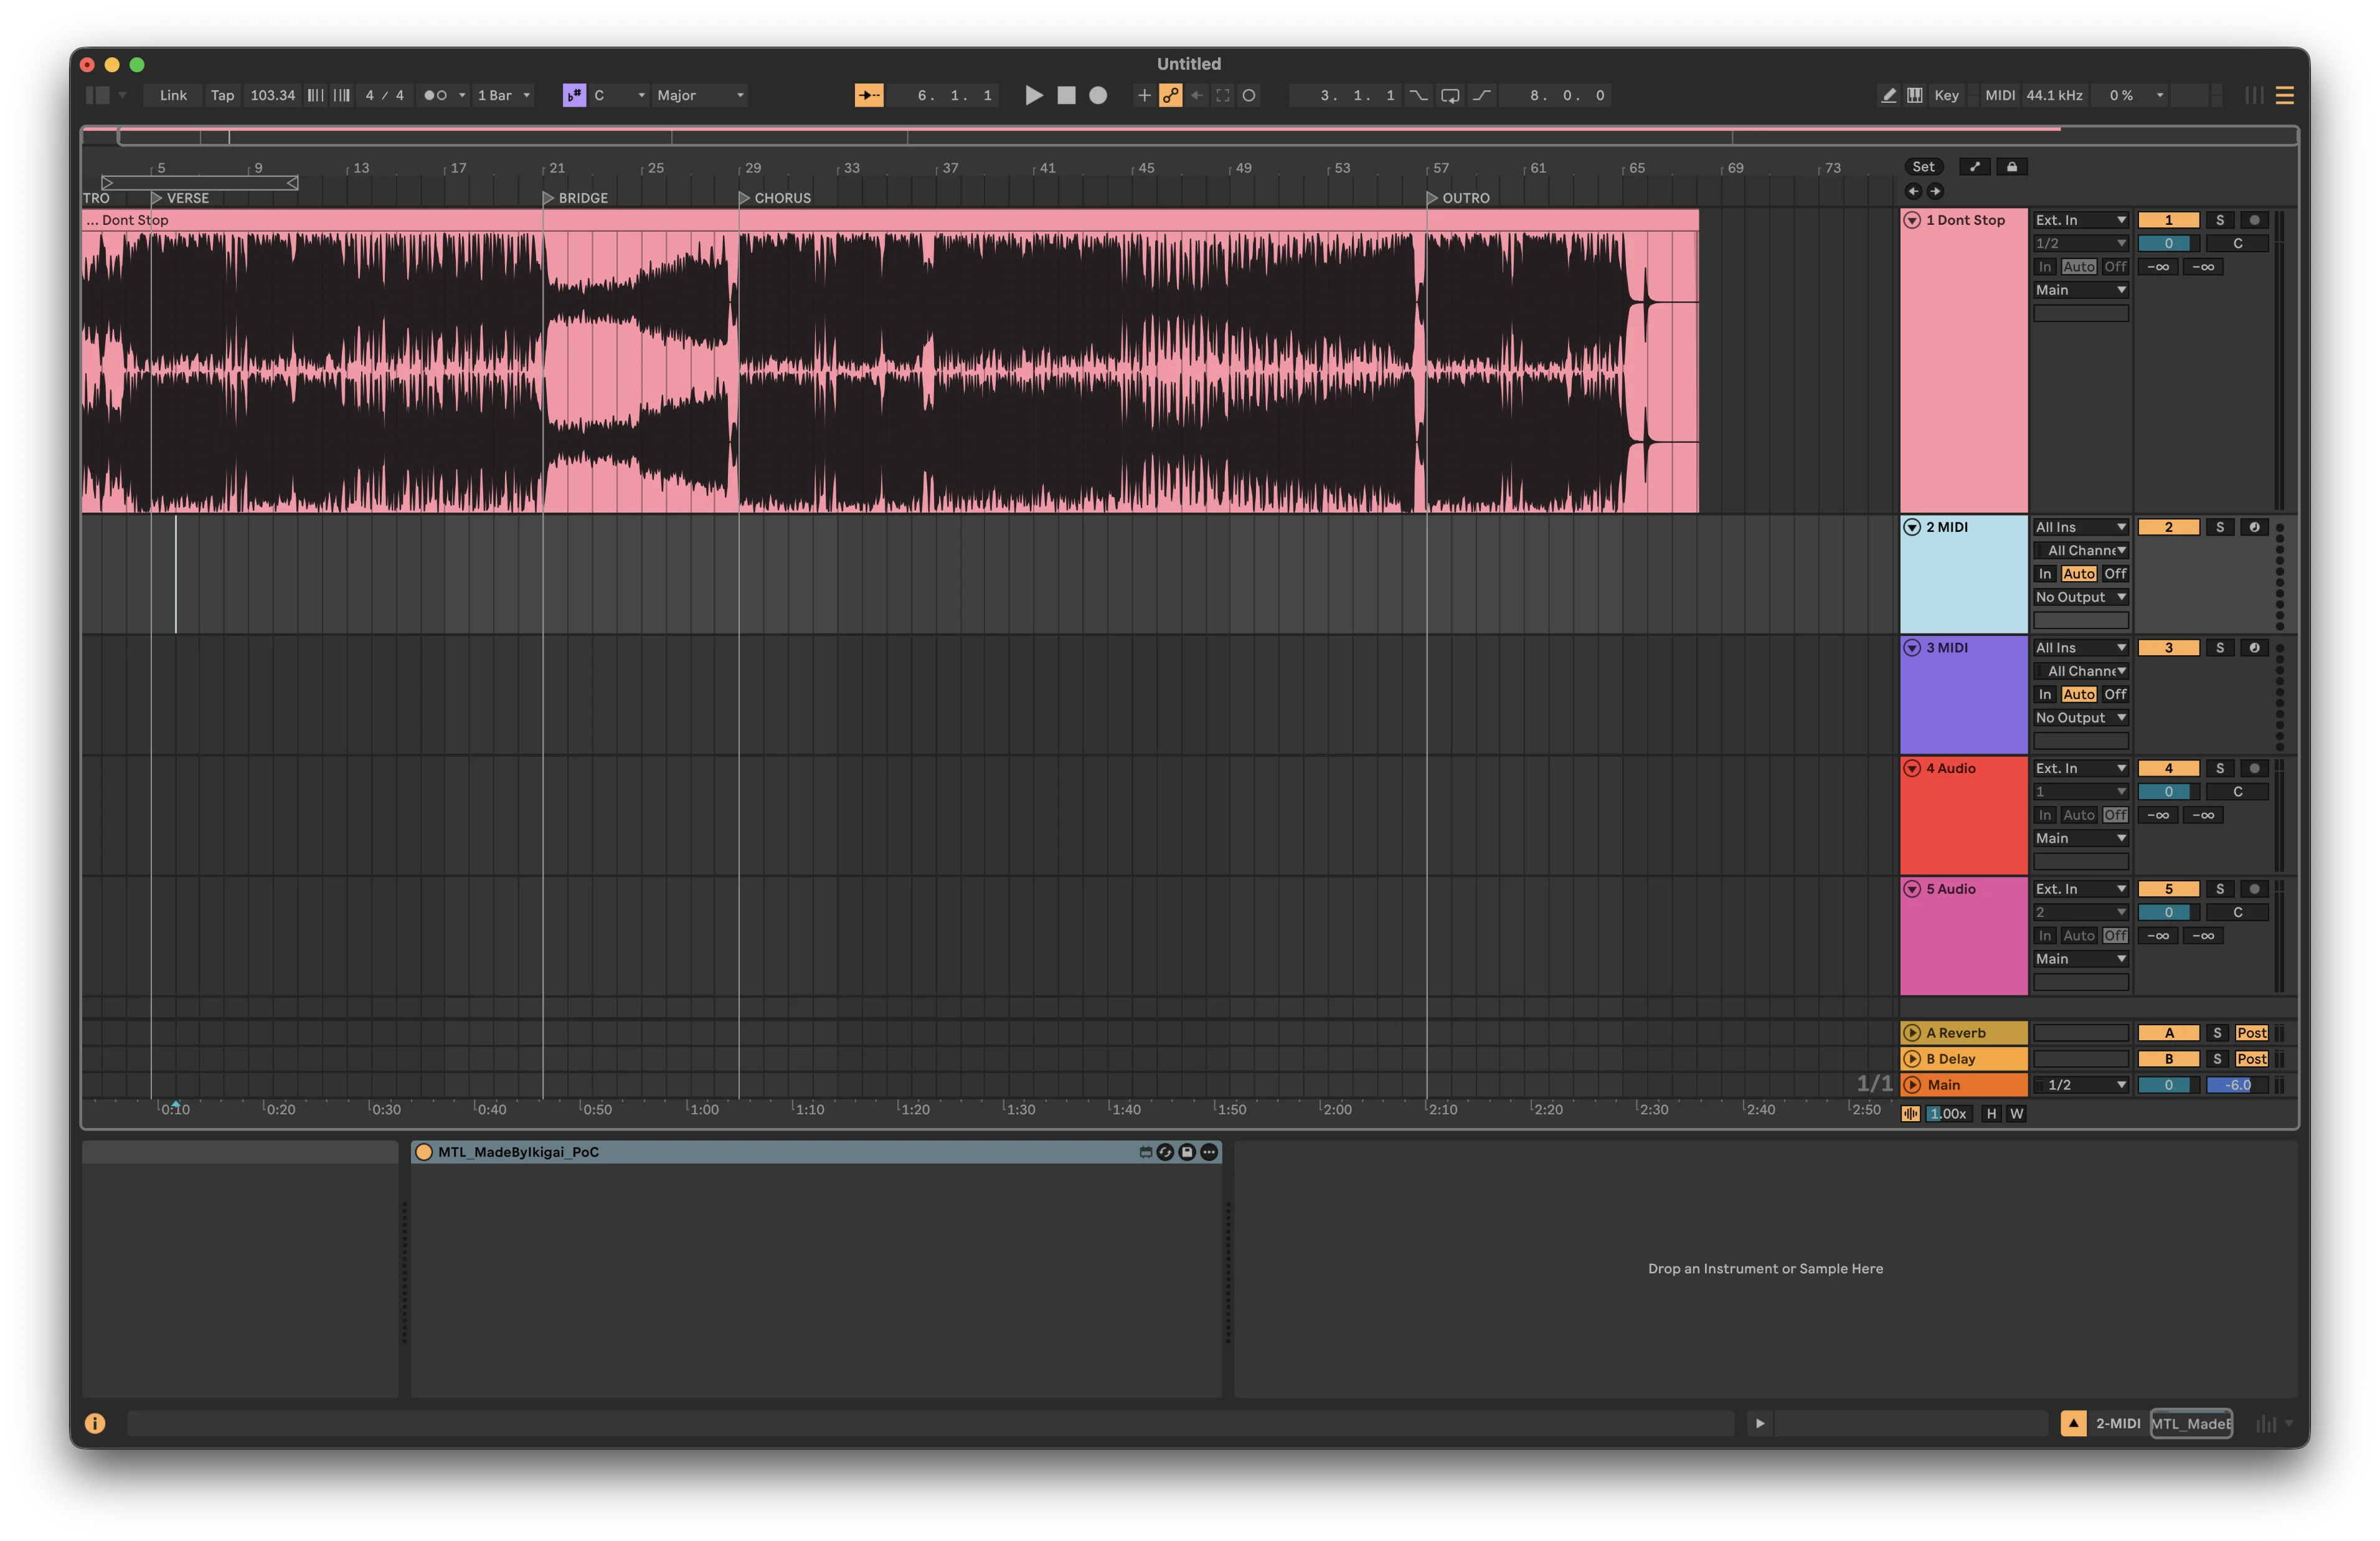
Setting Up in Ableton Live
Step 1: Connect the Arduino
Plug in your Arduino Leonardo via USB. It will appear as a MIDI device named "Arduino Leonardo" (or similar).
Step 2: Configure MIDI in Ableton
- Open Preferences → Link/Tempo/MIDI
- Find "Arduino Leonardo" in the MIDI Ports section
- Enable Track and Remote for the Input
Step 3: MIDI Map the Volume
- Enter MIDI Map Mode (Cmd/Ctrl + M)
- Click on the track volume fader you want to control
- Press one of your buttons
- Exit MIDI Map Mode
Now your physical buttons control that fader.
Alternative: Use a MIDI Track
You can also route MIDI to a track:
- Create a new MIDI track
- Set Input to "Arduino Leonardo"
- Arm the track for recording
This allows you to record automation from your physical controller.
Extending the Project
This PoC is intentionally minimal, but it demonstrates the core concepts. Here are ideas for expansion:
Add More Controls
// Potentiometer for continuous control
int potValue = analogRead(A0);
int midiValue = map(potValue, 0, 1023, 0, 127);
sendCC(1, midiValue); // Send as Modulation
Multiple Channels
// Send to different MIDI channels
void sendVolumeChange(int channel, int volume) {
  volumeChange.byte1 = 0xB0 | (channel - 1);
  // ...
}
Add Visual Feedback
// LED brightness based on volume
analogWrite(LED_PIN, map(volumeLevel, 0, 127, 0, 255));
Rotary Encoders
For endless rotation (like the push encoders on professional controllers), consider using rotary encoders instead of buttons:
#include <Encoder.h>
Encoder myEnc(2, 3);

void loop() {
  long newPosition = myEnc.read();
  if (newPosition != oldPosition) {
    volumeLevel = constrain(volumeLevel + (newPosition - oldPosition), 0, 127);
    sendVolumeChange(volumeLevel);
    oldPosition = newPosition;
  }
}
Troubleshooting
Arduino Not Recognized as MIDI Device
- Ensure you're using an Arduino Leonardo (or compatible board with native USB)
- Try a different USB port
- Check that MIDIUSB library is installed
MIDI Messages Not Reaching Ableton
- Verify MIDI ports are enabled in Ableton preferences
- Check that the correct input is selected
- Use a MIDI monitor tool to verify messages are being sent
Volume Jumps Erratically
- Check button connections for loose wires
- Add debouncing if needed:
unsigned long lastDebounceTime = 0;
unsigned long debounceDelay = 50;

// In button check:
if ((millis() - lastDebounceTime) > debounceDelay) {
  // Handle button
  lastDebounceTime = millis();
}
Conclusion
Building a custom MIDI controller is more accessible than many producers realize. With just an Arduino Leonardo and a few components, you can create hardware perfectly suited to your workflow.
This PoC demonstrates the fundamentals:
- Native USB-MIDI communication
- Standard MIDI CC messages
- Dynamic response for natural control feel
The complete source code is available on GitHub: musictechlab/mtl-arduino-midi-ableton
Whether you want to add dedicated transport controls, build a custom mixing surface, or create an experimental instrument interface - the principles remain the same. Start simple, and build from there.
Resources
Need Help with This?
Building something similar or facing technical challenges? We've been there.
Let's talk — no sales pitch, just honest engineering advice.
Bravely App: Boost Productivity with Django
How we built a custom data management tool with Django, Kubernetes, and Celery to automate internal processes and boost team productivity.
C2PA in Ableton: Making AI Music Provenance Visible Inside Your DAW
In May 2026 we shipped an MCP for reading C2PA manifests in music. This post is the follow-up: the same reader, now inside Ableton Live as an open-source Max for Live device.
Related Articles

Technical Partner
Technical partner at MusicTech Lab with 15+ years in software development. Builder, problem solver, blues guitarist, long-distance swimmer, and cyclist.
Newsletter
Get music tech insights, case studies, and industry news delivered to your inbox.